Wednesday, 3 October 2012

In A Dark, Dark Wood


I wanted to share with you the artwork that inspired me to start a blog.  I did this lesson with my Grade One class last year.  After displaying it up on the hallway bulletin board I was approached by one of my fellow primary teachers, Sandra Farrell, who asked if she could put it up on her teaching blog.  I was so flattered!  So I considered the idea of starting my own art blog.

Check out the orginial post on her website http://savvyteachingtips.blogspot.ca/
Her photos are much more impressive than my 'afterthought' iphone ones!  Sandra teaches Grade two and has tonnes of great resources for all you primary teachers.  Make sure you check out her other blogs too.  She is a very talented scrapbooker and cardmaker!!!


I had seen a few different examples of this type of tint and shade lesson on Pinterest, mostly done with a cityscape or a single tree silhouette.  I had been saving these craft foam haunted houses for at least 2 years and was determined to incorporate them into some type of activity.  After reading In A Dark, Dark Wood with my class, the two ideas seemed a natural fit!


We started out by painting a white moon shape in the sky.  We then added a small amount of blue paint to the white paint pot to create the first tint.  We painted a circle around the moon using the new tinted colour.  We then added a bit more blue paint to the paint pot and repeated the process.  I have 5 table groupings in the classroom and each table had one pot of paint to use.  The kids took turns adding blue and mixing the new tint.

After a certain point the kids just painted the rest of the paper with the last tint.  The paintings were left to dry.


We then attached the foam houses to the bottom of the paper.  Next we used black markers to draw some spooky trees.  The kids were instructed to keep the trees shorter than the house to make sure the scale of the drawings fit with the size of the house.


The final touch was colouring in the windows with a white pencil crayon.


It all made for a wonderful October display.

Saturday, 11 August 2012

Skunks!!!


Here is an easy craft I that my kids did with me this summer.  My teaching partner and I are planning a nocturnal animals unit for this fall and I have been toying with the idea of making 3D skunks.  My daughter's Littlest Pet Shop skunk was the inspiration for this activity.


You will need:
black chenille stems
white chenille stems
black and white acrylic paint
clay or dough
googly eyes (optional)

Step 1:  Make the tail.


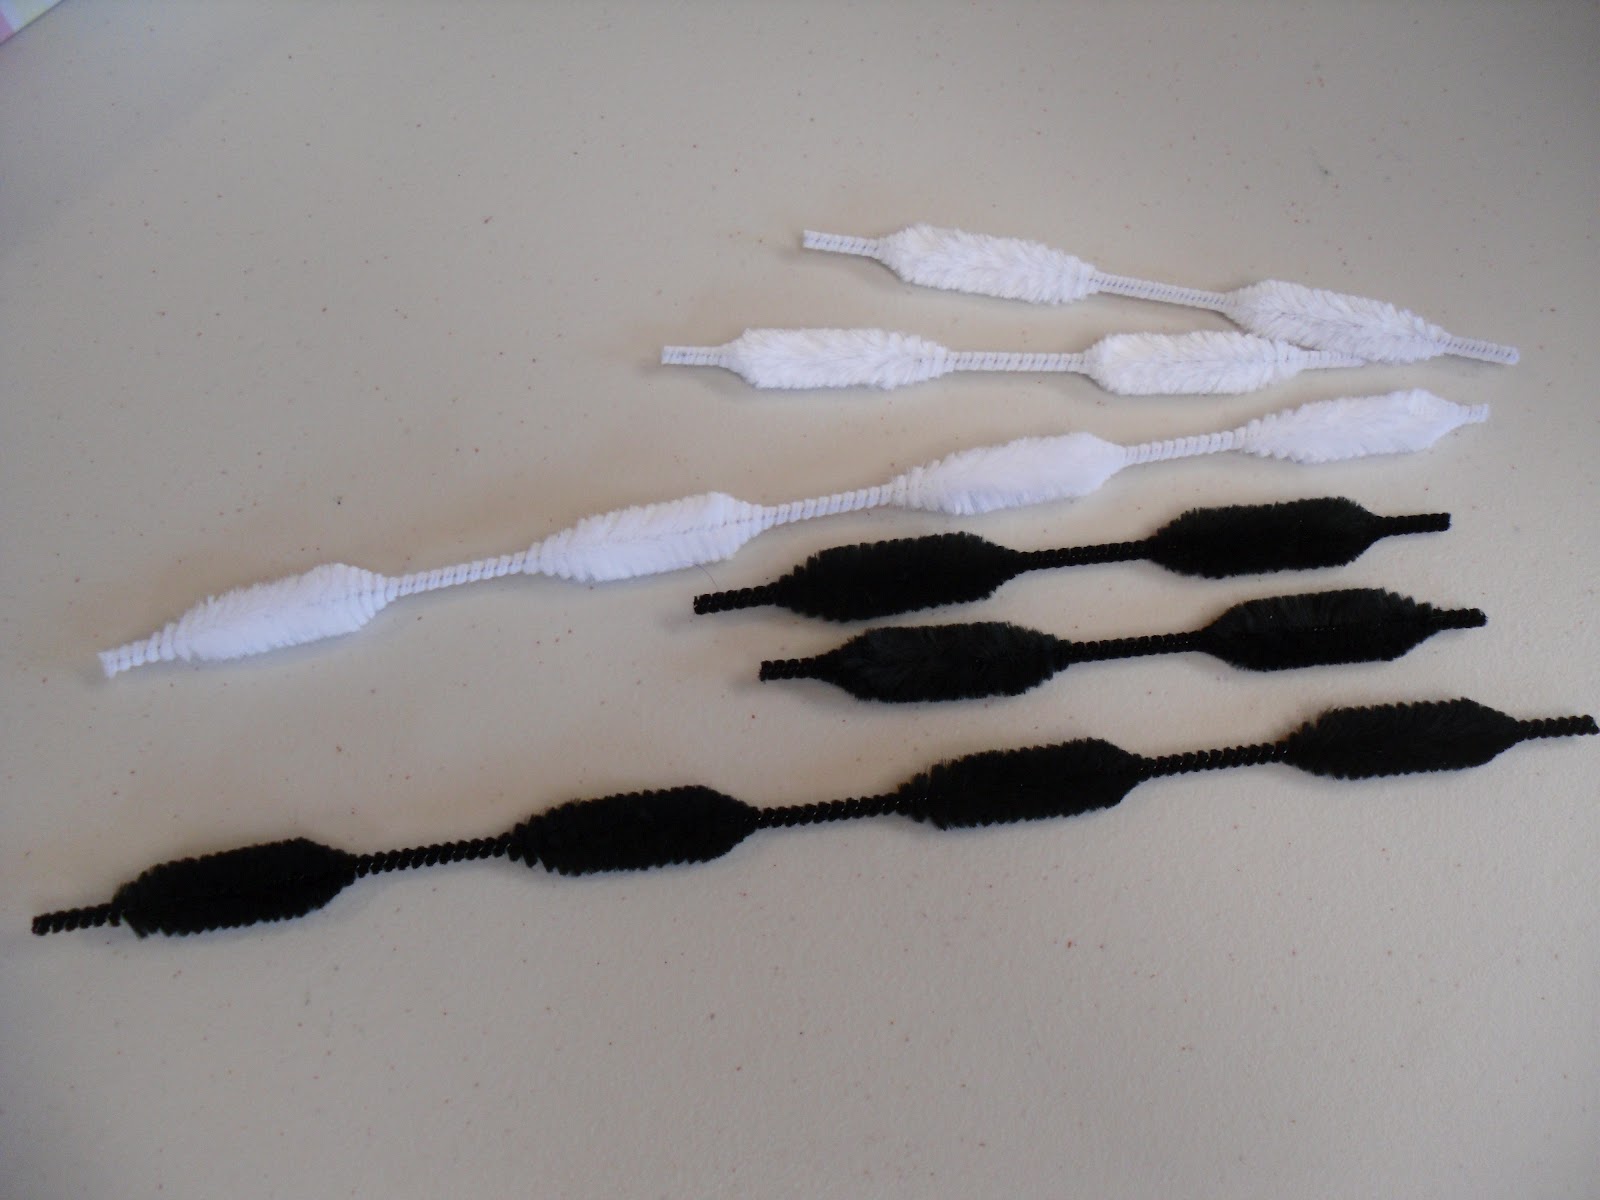
Cut the chenille stems in half so that you have sections with 2 puffier parts in each.   Bend one white and one black stem slightly in half. 


Hook the chenille stems together and then wrap the white stem around the black.  


Bend all the ends towards each other.


Twist the loose ends around each other and bend and fluff to create your tail.


Step 2: Make the body.

We used simple salt dough but you could use any air dry clay or dough.  We rolled a little ball of dough into a teardrop shape and flattened it on the bottom.  We pinched the clay to create the ears.  Finally we used a pencil to poke a hole in the skunks backside where the tail will go.


Step 3: Paint

When the clay was completely dry we painted the entire body black.  When the black paint was dry we painted the white stripe, glued on the eyes and added the tail.


This is my daugher's skunk.


How awesome would it be if they really smelled???   I'm considering a nice smelling essential oil or maybe just a smelly sticker on the bottom...


Saturday, 28 July 2012

Clay Fish

One of the reasons I started this blog is the regret I have for not saving samples or photos of past art projects.  Now at the very least I should be able to take a decent photo with my iphone, but my goal is to keep a camera in my school bag at all times. 


I happened to find these pictures while going through past files of photos on my husband's computer - I work almost exclusively on my laptop.

This was one of my first clay projects ever with a grade one class.  It was a project that would eventually test our school's kiln which had sat dormant in our school for years - until I showed up and learned we had one! This would be a good introductory lessons with clay. 

After spending some time exploring different texture tools, students would roll out a slab and use a fish cookie cutter to make their fish shape.  Using a damp finger they would smooth out any rough edges or cracks. Then they would use the different tools to imprint the details.  Before they move their piece to the drying shelf I would use a wooden skewer to print their initials on the back side of the fish.


We would then dry our pieces, fire in the kiln, glaze and refire. 

I always love the surprised expressions on the childrens' faces when they get their first look at their shiny ceramic artwork! They cannot wait to show their parents what they did! Priceless!

Tuesday, 17 July 2012

Pinch Pot Fun


I love summer!  With my time off from the classroom I'm free to try different projects that have been on my mind that I may not have had time to do otherwise.  I had some clay left over from when I did the clay plates with my son's class and decided to do some experimenting with pinch pots.  My daughter wanted to join in the fun so we created these pinch pot owls.


We used air dry clay.  First we created a simple pinch pot.  Then we added the wings which were actually made from a large heart cookie cutter that we then cut into half to create 2 equal wings.  Then we made 2 circles for the eyes and attached them.  Lastly we attached a beak shape.

We then used a bent paper clip to make impressions for the feathers.  A marker cap was used to help create the eyes and any other impressions were make by a wooden skewer.


This white owl in my 7 year old daugher's owl.  As I didn't have much in the way of acrylic paints at home she had to resort to painting it all white.  She didn't mind.  She said it was a snowy owl.

I think I'll buy some citronella tea lights and use them as candle holders during the summer months on our patio!


Here are some other pinch pot creations.


Thursday, 28 June 2012

Sleep Under the Stars: Camping Art


This was a one day project my Grade One class did 
during the last week of school. 
Our class was going on a camp field trip so we decided to do a
camping themed week to end the school year. 

The backgrounds were all done with oil pastels and the kids were encouraged to layer different shades of greens and browns.  They made their tents out of construction paper and glued them onto their pictures after all the pastel work was done.


Wednesday, 30 May 2012

Grade One Farm Landscapes


We have been learning about nutrition and where food comes from in our class.  I was inspired by folk art landscapes and the post from Painted Paper in creating this lesson.


Day One:  The students drew their horizon.  We added the barn, tree shapes and some students added a fence.   They were then instructed to draw at least 5 vertical lines, dividing their landscapes.  Next they drew a horizontal line in each section at varying heights, dividing each strip into two.  Finally we used blue tempera blocks to paint the sky.

Day Two: The students again used tempera block paints to paint the different sections of their landscape as well as the tops of the trees.
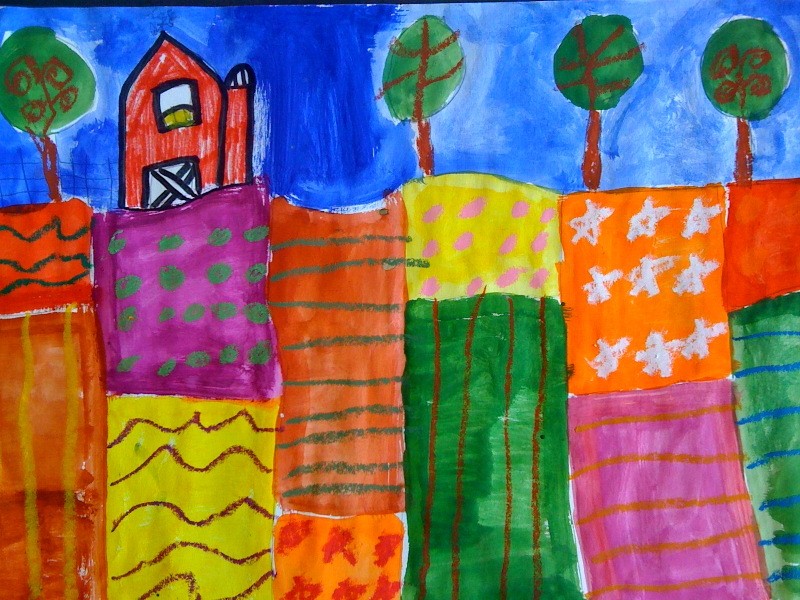
Day Three:  The students used markers to colour and outline their barns.  They used oil pastels to add patterns to their land sections, fences, and for the tree stumps and branches.

I love how bright and colourful they turned out!  The kids are so proud of them!


LinkWithin

You May Also Like

Followers