Showing posts with label Christmas. Show all posts

Monday, 2 January 2017

Stained "Glass" Trees


Here is an easy paper activity to do with your classes.  I got this idea from  HERE.  This activity could easily be done with the trees all in white and tissue in different cool colours for a fabulous winter window display - maybe next year for me! 


Students first cut out the tree template from 9 X 12 inch green card stock.  Then they glued pre-cut coloured strips of construction paper to one side of the tree.  They trimmed off any parts that showed past the tree on the outside.  They then added dots of white glue all around the template and strips and laid down a piece of green tissue paper.  When dry, they carefully trimmed off the excess tissue.


I did limit the kids to 6 or 7 strips though I don't think that's necessary: however, I do recommend that they use no less than 6.


Thursday, 8 January 2015

December Art

I know the holidays are over but I just wanted to share some of the wonderful art and crafts that my class did during the month of December.


 Love these salt dough ornaments!  So adorable and easy.  Find the original post here.  We added white iridescent sparkles to ours.  I will definitely do these again!


  Here is my version of the singing reindeer.  Think I would forgo the pipe cleaner antlers for a paper version next time - some of them have sort of an insects vibe :)


We made these paper strip Christmas trees.  Find the original post here.


And last but not least, we made these incredible elves with the help of Rob and his video at Art for Kids Hub.


I hope you all had a wonderful holiday!
Wishing you all the best for 2015!!!

Tuesday, 2 December 2014

Evergreen Trees


 My Grade One class made these patterned evergreen trees today.
 I am loving how they look clustered together on my bulletin board. 


 This was actually a 2 day project.  We spent the first session mixing and painting paper 3 tints of green by adding white to our green paint.  On day two we cut out large triangles and used chalk to make different patterns on each tree. White construction paper was used for the snow and chalk was also used to make snowflakes.


Wednesday, 25 December 2013

MERRY CHRISTMAS!!!

Grade One and Two painted trees with lights


Wishing everyone a very merry Christmas and a healthy and happy New Year!

Friday, 20 December 2013

Gingerbread Prints

Here is a cute little printmaking lesson I did with my class this week.  The kids loved the process in creating these!  This is definitely a lesson I will do again! 
 
 
We used Styrofoam plates to create our prints.  Students cut off the edges of their plates so that they were left with a flat circle.  They then took a gingerbread man cookie cutter  and pressed it into their plates to create an imprint.  Because this did not make a deep enough impression they then used dull pencils to retrace the shape.  Other details were added.  Some used marker caps to create smaller circles for eyes or buttons.
 
Then, using a brayer and brown paint, students rolled paint onto their imprinted plates.  They were given large sheets of paper so that they could make many attempts to make a clean print.

 
When they were dry we cut out 2 gingerbread men for our Christmas cards for our parents.  Her is my sample:

 
We glued them onto folded brown construction paper and added some white dots around the edges.


I also gave them coloured sequins to glue onto their cards, if they wished.  Unfortunately I did not have time to take any photos as we finished these on the last day of school before our break!


Saturday, 7 December 2013

Carolers

I happen upon these photos this past summer cleaning out a basement closet.  This is a craft I have repeated a number of times.  But this was my first attempt - my best guess is 2001!  In this photo the pine cone carollers are painted various colours.  But in other versions I chose to have the kids paint them white and add a bit of silver glitter.  They also used brown pipe cleaners for the arms to make them look like snowmen.  They always turned out great.


Caroler display outside the school office.

The heads are made from a Styrofoam balls with sequins (attached with pins) used to create the faces.  The scarves are strips of felt with a slit cut at one end to pull the other end through - no need for tying.  The hats are pipe cleaners twisted round and round and stuck into the back of the head.

Sunday, 23 December 2012

Santa Gnomes

Digging through my big bin of craft supplies in the summer I found this bag of pom poms in this really unappealing colour that I had inherited somewhere in my teaching career.  I've had the bag for years as I really had no idea what to do with them, other than toss them into the arts and crafts center for the kids to use in their own projects.

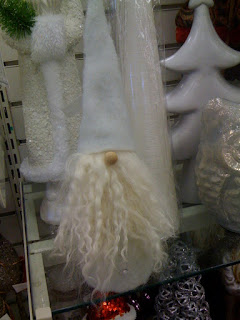
Until I came across this little guy:


I found this winter gnome in Winners and was instantly inspired!  Old man winter turned into this Santa Gnome:


Supplies for this craft:

red felt
red acrylic paint
white and flesh coloured pom poms
small plastic bottles (I used DanActive)
White craft fur or cotton balls
glue gun (or red thread if you feel confident in getting your kids to sew)
craft glue

Directions:

1. Remove the labels from your plastic bottles.  I cut the plastic labels off all the DanActive bottles.  I happened to have tonnes that I had been saving to make penguins.

2. Paint the outside of the bottles with the acrylic paint and leave to dry.   I actually spray primed the bottles because I saw someone else do that when painting plastic bottles, but honestly I'm not sure it is necessary.  I did find that when the kids painted that the colour didn't go on evenly, even with a second coat.  If I did this project again (and I probably will since I still have so many pom poms left!)  I would probably try to replicate the original and paint the bottles with a coat of white and then sprinkle with white glitter!

I also taped the openings of the bottles when they were dry with packing tape.

3. Cut out shapes to make the cone hats from the felt - sorry I don't have a template.  Fold the felt and secure with a needle. 


Carefully open the felt - as if it was a card and draw a line of hot glue gun along the edge from top to bottom, and then close again.  Or, option 2 is to sew this edge with red thread.  Doesn't have to b really well done because it will be turned inside out.

4. I precut l the craft fur into triangles.  The kids used craft glue to glue the beards to the bottles.

5. When the hats were dry, we carefully turned them inside out and stuffed another cotton ball into them.

6. We then carefully put them over to the bottle and squeezed some glue underneath to secure them.


7. Use craft glue to add the white pompom to the hat and the beige one for the nose.


Thursday, 6 December 2012

Reindeer Portraits


Reindeer Portrait by Grade One student


My Grade One class painted these reindeer portraits this week!  I am so pleased with how they turned out!


Here is how we drew them:

Place a finger at the bottom of the paper and trace both sides to make the neck.
  
Using your opposite hand as a guide for size, draw a circle around your hand (not tracing) so that your oval is wider and taller than your hand.


Draw a line from the top of the head towards each of the top corners of your paper.


Draw ears at the top of the head pointing to the sides of the paper.

Draw a large horizontal oval at the bottom of the face for the nose.
Draw 2 vertical ovals at the top of the face for the eyes.


Add dots for the eyes and finish the antlers.
Draw a rounded square around the neck - there will need to be a bit of erasing here to hide the lines of the neck.

Finish the scarf.


We then used black oil pastels to outline our drawings and I had them paint the scarf, nose and the background.


Then next day we added a bit of peach pastel to the inside of our reindeers' ears, white to add details to the scarf, and went over our antlers and any other spots where we felt needed some more black outlining.  We used brown paint to finish the reindeer.


If you liked this post, check out some of my other directed drawing lessons:


LinkWithin

You May Also Like

Followers