Showing posts with label spring. Show all posts

Tuesday, 11 April 2017

Chalk Pastel Bunnies for Easter


How adorable are these little guys?!? 
I experimented with a new bunny portrait lesson this year.  These bunnies were created by my little Grade 1 and 2 artists.

Created by 6 year old artist!
I love chalk pastels.  They are one of my favourite mediums to work with.  
But be forwarned as they are VERY messy.  


We did this lesson over 3 days as I spent the first day letting them explore the pastels on large sheets of newsprint and then practising how to make our bunny shapes.  We also practised not putting our free hand onto the markings we made on our papers...


The students started with a neck, then made 2 touching circles (like a sideways 8).  They traced over their circles repeatedly, trying to make them both the same size.  Its okay if they aren't right on the first go as you can always add to the shapes and rub away some of the mistakes.  Once the circles were pretty equal they continued tracing their circles a few more times.


Next they added a "hill" on the 8.  Again tracing until they were happy it was fairly centred on the sideways 8.


Next they added the ears.  I had said that they kind of make an M shape, and as you can see some of them took that very literally!! 


Once they were happy with their bunny form they were asked to use ONE finger to blend the chalk as if they were re-drawing the bunny - going in circle motions around the 8, back and forth on the hill, and the ears they were free to colour in the the chalk.  They were to try to drag the chalk into the shapes to fill them as they were tracing.


For the next part we switched to oil pastels.  They made a small upside down triangle in the 'dip' of the top of the sideways 8 and drew a line and upside down Y for the rest of the muzzle.  Eyes were added to the sides of the head and inner ears were coloured.


I got them to paint the backgrounds in liquid water colors to wash away any fingerprints around the bunny heads.


The final touch was to add whiskers with a black sharpie.


Thursday, 24 April 2014

Mixed Media Flowers


Last week I was fortunate enough to be invited into my daughters Grade 4/5 class to do an art lesson.  I always look forward to the opportunity to work with intermediate students.  The toughest thing for me is deciding on a project that I can do in one hour or in one afternoon.  Here is what I came up with.


  In one afternoon we touched upon many concepts including colour choice, blending colours, proportion, overlapping and line.  The flowers were drawn and coloured with chalk pastel and outlined in oil pastel.  The backgrounds were painted with watercolor.

Tuesday, 1 April 2014

Easter Bunny

Here is a cute and simple little art activity my Grade 1/2 class did for Easter.  

We did a directed drawing of these whimsical bunny rabbits on paper trimmed to 7 X 12.  Then we used oil pastels for colour and outlining.  The final step was to paint around the rabbits with water color paints.


Here is the step by step, similar to my Reindeer Portraits step by step:

 Students put their non-drawing hand at the bottom of the paper and draw around their hand (not tracing their hand) to make the head shape.  They put a dot in each of the top corners.  This will help them make their ears nice and long.


 Using the dots as guides, student connect the dot to the top of the head making the ears. Next they draw a dot in the center of the face.


From that dot they will make 2 circular shapes beneath it.  Encourage big shapes.  They do not need to be even or symmetrical.
The final step is to add a little bump for the nose, 2 teeth, whiskers that extend outside of the head and the inner ears.


Here are a few more examples from my students:


Friday, 17 May 2013

Sunflowers


On Earth Day my Grade 1 students planted sunflower seeds.  The plants are now at varying stages of growth and the children excitedly check on their own plant each morning.  I thought the children would enjoy creating some bright sunflower artwork.

We created these sunflower paintings using the same cut sponges used in my

Day One:  We made our petals by painting the sponges and then stamping them onto our papers.  We drew a small circle with pencil as a reference point and then worked our way around it.  We then used green paint to add a stem and sponged leaves onto the stem.


Day Two:  We used brown oil pastels to colour in the center circle of the sunflower.  We then used orange and green pencil crayons to add texture lines to the petals, stem and leaves.  The final step was to use blue pastel to colour in the background.

 The make our classroom very bright and cheery!


Tuesday, 14 May 2013

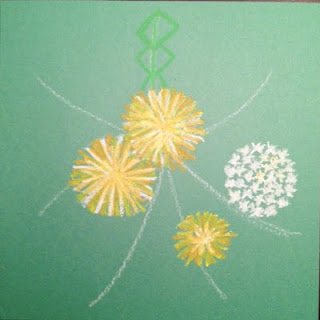
Dandelions: Bird's Eye View


I'm think I'm obsessed with dandelions!!!

I promised my daughter's teacher that I would come into her classroom at the end of this month to do a painting project.  I decided on a simple watercolour dandelion.  While searching different images I found this interesting quilt pattern and was instantly inspired: 

I originally found this on this blog http://woodhavenstudio.wordpress.com/ but can no longer locate the photo and would love to give credtit to the designer.


I wish that I could do this project as well as the painting activity but unfortunately with all the year end events and feeling the crunch of report cards creeping up, I'm just not going to have the time.  But here is how I did it:

You will need:
9 X 9 piece of green construction paper
oil pastels


LinkWithin

You May Also Like

Followers