Wednesday, 16 April 2014

And now we wait...

I am so disappointed!  

We made these wonderful clay daffodils with another class for spring.  They were supposed to go into our school display case for April and then we were going to wrap them with a tea light candle inside for a Mother's Day gift.  


However, something is terribly wrong with our school's kiln.  During the first firing the kiln made so much noise that the Grade 7 class, where the kiln is located, had to relocate to another room!!!

So now we have to wait for our next in-school professional day to do the second firing, so as not to disturb the class again.  Luckily it is at the end of this month.  So, although they won't get the chance to be displayed, they'll at least be ready to go for Mother's Day.

Here is a bird's eye view:


Can you figure out what we used to help shape them?  We used a snowflake cookie cutter for the bottom and a small pinch pot for the top.

They are glazed and ready to go. Stay tuned for the finished product!

Tuesday, 1 April 2014

Easter Bunny

Here is a cute and simple little art activity my Grade 1/2 class did for Easter.  

We did a directed drawing of these whimsical bunny rabbits on paper trimmed to 7 X 12.  Then we used oil pastels for colour and outlining.  The final step was to paint around the rabbits with water color paints.


Here is the step by step, similar to my Reindeer Portraits step by step:

 Students put their non-drawing hand at the bottom of the paper and draw around their hand (not tracing their hand) to make the head shape.  They put a dot in each of the top corners.  This will help them make their ears nice and long.


 Using the dots as guides, student connect the dot to the top of the head making the ears. Next they draw a dot in the center of the face.


From that dot they will make 2 circular shapes beneath it.  Encourage big shapes.  They do not need to be even or symmetrical.
The final step is to add a little bump for the nose, 2 teeth, whiskers that extend outside of the head and the inner ears.


Here are a few more examples from my students:


Tuesday, 11 March 2014

Penguins

This is a new version of a project I have done before.  Previously I did the entire project with modelling clay, including the background.  This project was done with Crayola Model Magic and water color.


We first made our penguins with the Model Magic and left them to dry.    We started by making a flat oval with black and adding white ovals and circles for the tummy and eyes.  Orange was used for the beak and feet.  I have to say I am now a fan of this product!  It is soft and light and easy to work with.  The pieces stick really easily.  When dry, the piece is very light.  These could have easily been made into magnets!


We then created the background on 4 X 6 inch paper using white oil pastel for the snow/ice and watercolor paint for the sky.  We also sprinkled a bit of salt on the wet paint for a frosty effect.  Finally, we glued the dried penguins to their backgrounds.


Friday, 21 February 2014

Valentine Mailboxes

We made these super sweet mailboxes for Valentine's day! 


I had all the kids bring in cardboard boxes from crackers, instant oatmeal, Kleenex, etc.  We cut off all the loose cardboard at one end to make the opening.  The toughest part was wrapping the black craft paper around the boxes.  My aide and I helped the kids with that part but the rest of it was up to them.  They had lots of different heart tracers to create the tummies, beaks and feet and even the flippers which were a heart cut in half.  Some of the kids were so into them that every free moment they were creating all sorts of accessories: hats, sunglasses, bracelets...  Some even wanted to play with them at center time! 


Thursday, 20 February 2014

Valentine's Day

This is a little late, but... here is what we did for our Valentine's day art:


I was inspired by Merrilee's post at Mer Mag to create these lovely valentines.  Check out her post for the instructions on the painting portion of this lesson.

After painting our grids we cut our different sized hearts and individual colour squares to embellish our papers.  It was great fine motor practice - something my students need a tonne of! 


The final display in our hallway

Saturday, 25 January 2014

Polymer Clay Creatures

I haven't posted in a while.  I finally got myself a new laptop, something I probably should have done about 8 months ago but was avoiding...  Anyway, it has been a bit of a learning curve getting accustomed to the new features but I think I'm making progress.

My 9 year old daughter was at home sick yesterday and when she felt up for it we decided to break open her new Polymer Clay kit that she got for her birthday.  She had been experimenting with an older kit previously but this was my first time working with polymer. 

After searching Pinterest for some ideas (and hopefully some tutorials) we managed to create these together:


The first one we made was they Mickey charm, in honor of our upcoming trip to Disneyland.  My kids have never been before so the are very excited!


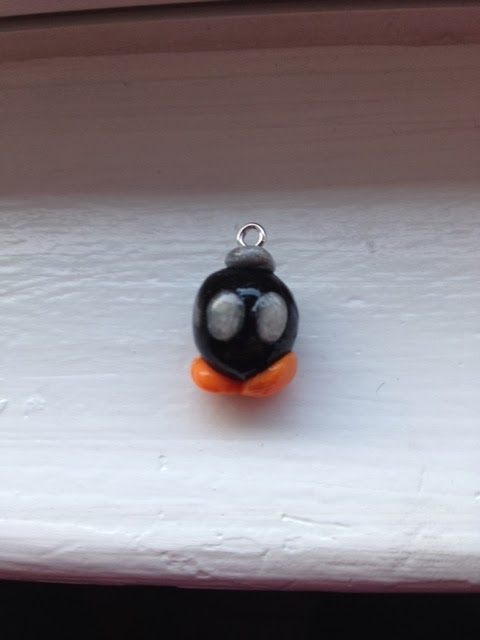
If you are familiar with the Mario Bros. video game, them you'll recognize this guy that my daughter made all by herself:


What was strange was how the white reacted in the different pieces.  The white in the Mickey came out so vibrant but in the cat, Bom Om, and Minion it seemed to take on a pearlized color.  Not sure if it was due to residue on our hands from the silver clay or from 2 different white packages...


It was fun creating these and it sure made up for being stuck inside on a beautiful day!


Wednesday, 25 December 2013

MERRY CHRISTMAS!!!

Grade One and Two painted trees with lights


Wishing everyone a very merry Christmas and a healthy and happy New Year!

LinkWithin

You May Also Like

Followers