Tuesday, 5 February 2013

Primary Colours and Piet Mondrian


I have 2 Mondrain activities to share with you.  I love to use the works of Piet Mondrian to introduce primary colours to my students.

 I did the following Mondrian inspired art with my class last year.  Students used pencils and rulers to draw 5 vertical lines and 4 horizontal lines.  I then asked them to erase a few of the smaller lines created when lines crossed each other.  Using a black pastel the students traced over their lines.  We then used red, blue and yellow tempera block paints to colour in a few of the shapes... They probably coloured in too many but kids love colour and it was hard to keep them from painting in the whole page!


This second version I tried this year.  We integrated computers with art. 


Kids used the program KidPix to create their grid lines.  They had to use the pencil tool to draw straight vertical and horizontal lines from one edge to the other.  Then using the eraser they had to erase a few of the small lines.  Any erasing that took away too much black was later corrected with a black marker.
We then used broad tip markers to colour in the rectangular shapes.  It was a great opportunity to teach them proper colouring techniques using markers. 


I love how bold the lines turned out using the computer program.  Ideally we would have used the paint bucket feature to fill in the colour but our school's computer lab printer only prints in black and white.


Wednesday, 23 January 2013

Clay Owl Ornaments

This clay activity is very popular on Pinterest and I couldn't wait to try it this year.  You can find the easy to follow instuctions on the crafty blog 4 Crazy Kings


We used air-dry clay to create these ornaments.  We also added a few extra details.  We used paperclips to make feather-like impressions on the wings and a wooded skewer to make the feet.  Then we added a paperclip to the top of the head so that we had something to tie our ribbon to.

When they were completely dry they were painted all over with white acrylic paint.  Then the kids had gold and silver paint to use as they wished.  We glued on dollar store gems to the eyes and added the ribbon.

My photos aren't the best as I was in a rush to get a couple of shots of them on my iPhone before they were sent home before the holidays...


Wednesday, 16 January 2013

Snowflake Collage


We have been experimenting with different printmaking activities to create these snowflake collages.

We added a computer activity to go along with our art display.
To create these collages we first used bubble wrap to create the background "blizzard".  Students painted blue paint onto their bubble wrap then flipped it over and made a few prints all over their paper.  Then they painted white onto the bubble wrap which created a lighter tint of blue and printed that onto their papers.  They continued with the white paint until they were actually seeing white prints on their papers.


At another station kids used brayers to roll paint onto snowflake stamps.  Some of the stamps I easily made by glueing large foam stamps onto cardboard.  The other smaller snowflakes were ones I bought on sale at Michael's for about 75 cents each.

When everything was dry the students had to carefully cut out their snowflakes.  I asked them to leave a white boarder around each flake and not get the scizzors to cut the paint.

Here are some of their samples:


We also added a word processing component with our display. My kids worked on this during their computer block.  Here is the sign I posted in the middle of the display:
 

Saturday, 12 January 2013

Snowman Families

This was a last minute change of plans for my Friday Buddies activity. My Grade One class is learning about families this term, and this week I taught them the poem Snowman Family by Valerie Schiffer. And then Thursday evening I came across this project on Artsonia and knew I just had to do it.  So when I came in Friday morning I quickly gathered supplies for this new lesson.

We had already discussed the difference between our immediate family and extended family.  Students were asked to recreate their own immediate families out of snowmen and to consider the size of each family member when creating them.

To create a snowman the students used regular white chalk to draw the 3 circles of the snowperson and went over each circle 2 or 3 times.  When each snowperson was done they used a finger to gently smudge the chalk (using a circular motion) into the inside of the circles. 

Then they used oil pastels to create the noses and eyes - making sure to keep the noses within the shape of each head.  Next they cut out each snowperson.  They used templates to trace and cut out the circle and base of the snowglobe.  Then they coloured in the bottom of the snowglobe and added snowflakes.  In hindsight I should have either used white oil pastel or white crayon to colour in the snowglobe as you can see that the chalk left a lot of smudges.

Here are a few more samples:

Saturday, 29 December 2012

Snowflake Resists

Here is a winter art project I did with my grade one class last year before I started this blog.  I printed out large snowflake templates on my computer and allowed them to trace them by taping a blank paper to one of the templates.  Kids who had difficulty seeing the template through the paper were allowed to place their papers on the window.  The light passing through the window made the black lines show through more easily. Some children chose to remain at their desks and could see the outlines just fine. They used white oil pastel to try to replicate the snowflake onto their blank papers.  Encourage your students to press hard with the oil pastels.


When the large snowflake was complete they made other freehand drawings of smaller snowflakes around the large one.


Then the students used watercolors in cool colours to paint right over their oil pastel drawings and tracing. While the paint was still wet they sprinkled salt over the paint to create a frosty effect.


This creative student had the patience to outline the entire template instead of colouring it in!


Sunday, 23 December 2012

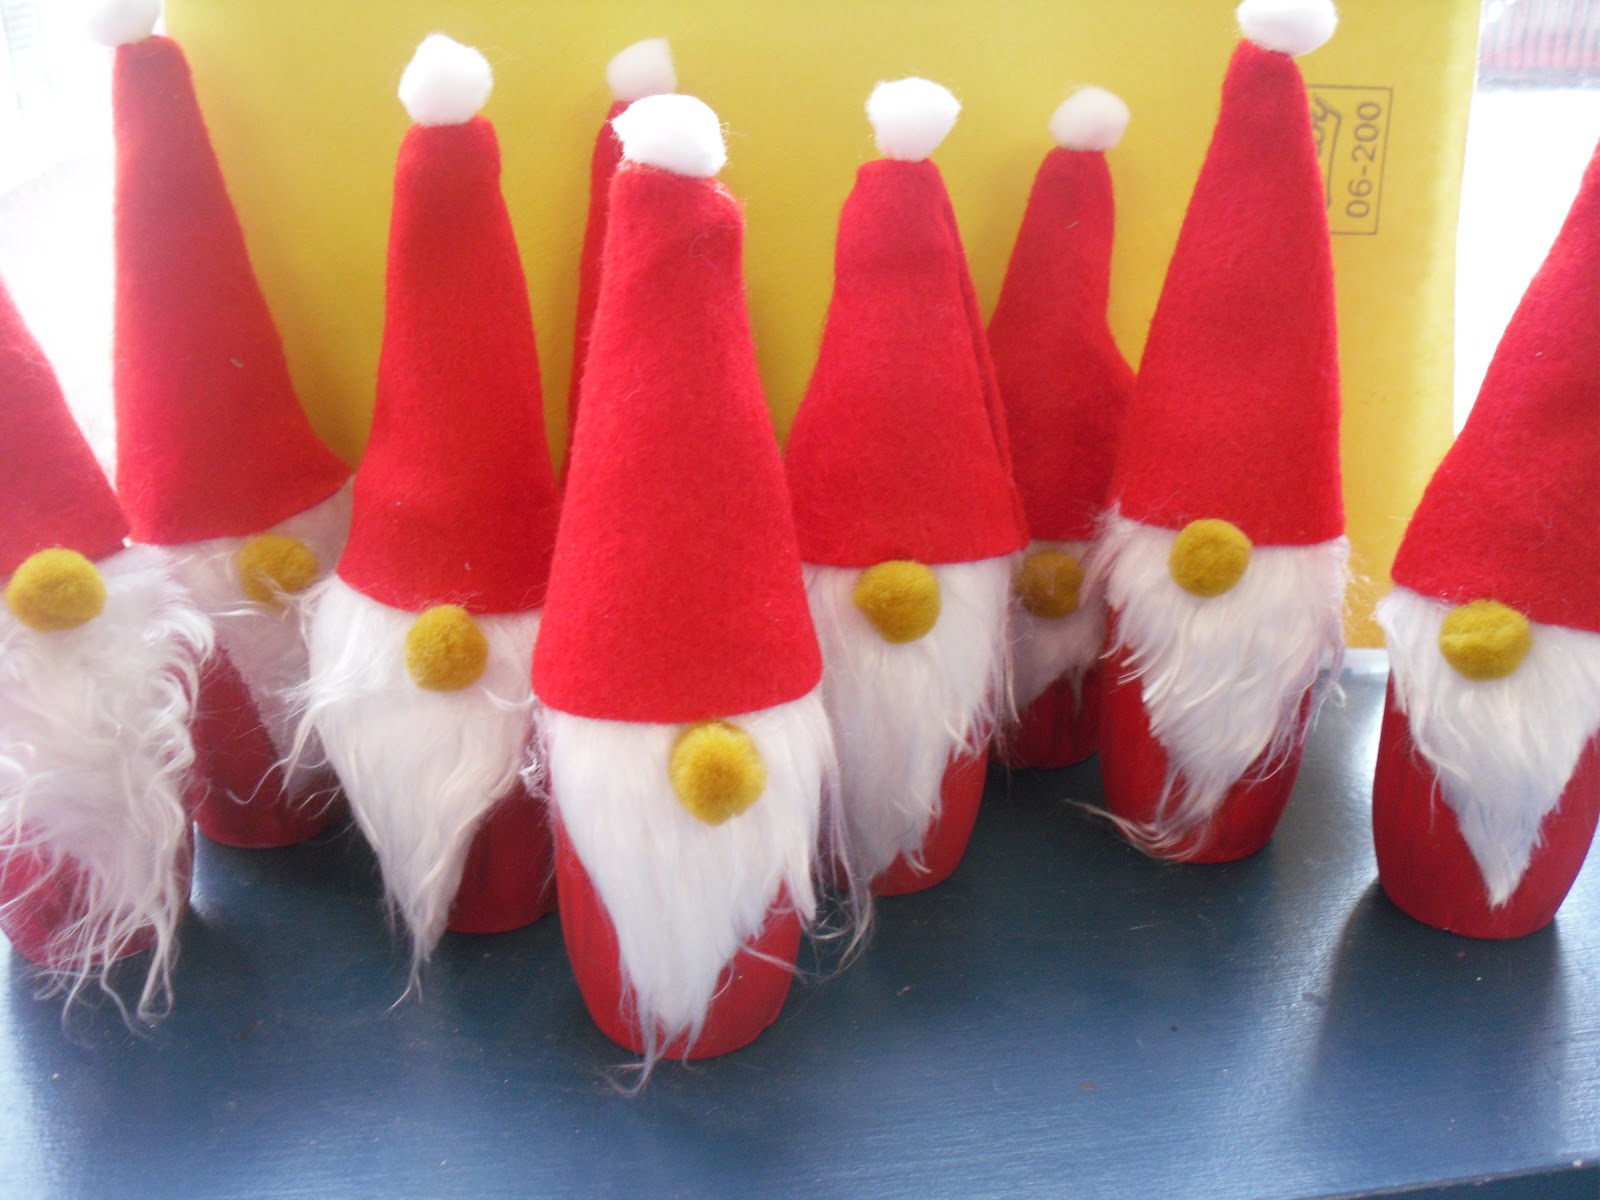
Santa Gnomes

Digging through my big bin of craft supplies in the summer I found this bag of pom poms in this really unappealing colour that I had inherited somewhere in my teaching career.  I've had the bag for years as I really had no idea what to do with them, other than toss them into the arts and crafts center for the kids to use in their own projects.

Until I came across this little guy:


I found this winter gnome in Winners and was instantly inspired!  Old man winter turned into this Santa Gnome:


Supplies for this craft:

red felt
red acrylic paint
white and flesh coloured pom poms
small plastic bottles (I used DanActive)
White craft fur or cotton balls
glue gun (or red thread if you feel confident in getting your kids to sew)
craft glue

Directions:

1. Remove the labels from your plastic bottles.  I cut the plastic labels off all the DanActive bottles.  I happened to have tonnes that I had been saving to make penguins.

2. Paint the outside of the bottles with the acrylic paint and leave to dry.   I actually spray primed the bottles because I saw someone else do that when painting plastic bottles, but honestly I'm not sure it is necessary.  I did find that when the kids painted that the colour didn't go on evenly, even with a second coat.  If I did this project again (and I probably will since I still have so many pom poms left!)  I would probably try to replicate the original and paint the bottles with a coat of white and then sprinkle with white glitter!

I also taped the openings of the bottles when they were dry with packing tape.

3. Cut out shapes to make the cone hats from the felt - sorry I don't have a template.  Fold the felt and secure with a needle. 


Carefully open the felt - as if it was a card and draw a line of hot glue gun along the edge from top to bottom, and then close again.  Or, option 2 is to sew this edge with red thread.  Doesn't have to b really well done because it will be turned inside out.

4. I precut l the craft fur into triangles.  The kids used craft glue to glue the beards to the bottles.

5. When the hats were dry, we carefully turned them inside out and stuffed another cotton ball into them.

6. We then carefully put them over to the bottle and squeezed some glue underneath to secure them.


7. Use craft glue to add the white pompom to the hat and the beige one for the nose.


LinkWithin

You May Also Like

Followers